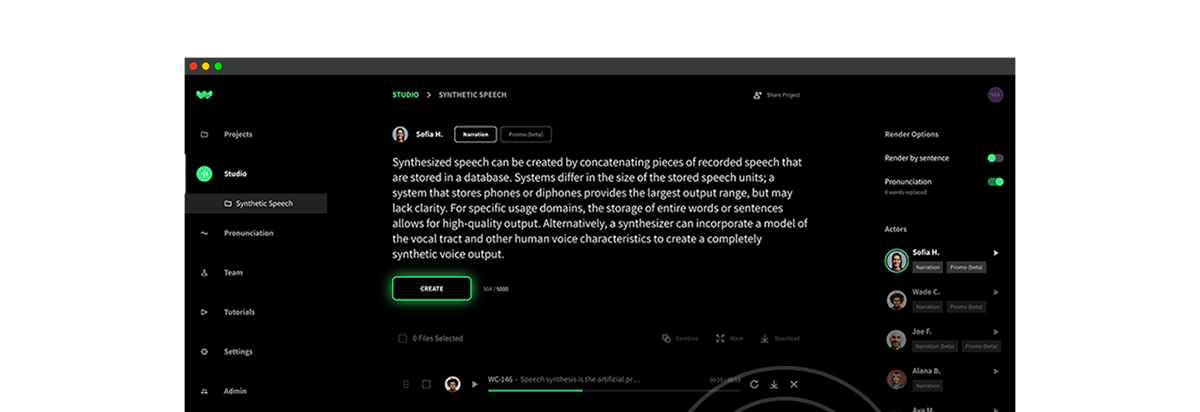
Welcome to the next post in our series on adding a WellSaid Labs voiceover to your eLearning course! In this post, we’ll be adding audio to a basic course developed using Adobe Captivate.
You’ll learn how to add audio to a slide and to an object, such as an image.
Getting Started
Open up Captivate.
If you have some courses already created, they’ll show up here, on your opening screen. Double click on your course. We’ll be adding audio to “Creating with Text-to-Speech.”
Adding Audio to a Slide
First, we’ll add audio to an entire slide. Choose this option when you have narration that should automatically play along with the slide.
On the left side menu, click on the slide you’d like to narrate. Click “Audio,” then select “Import to: Slide” from the dropdown menu.
A system dialog will pop up. WellSaid Studio files download as wav files. Captivate also accepts other audio file formats, such as mp3, m4a, wma, aac, aiff, aif, and ogg files.
Navigate to your audio folder. Select your WellSaid Studio wav file.
You’ll see a selection menu pop up from Captivate. Here, you have the option to time the length of the audio clip to the slide or to extend the audio clip for several slides. For our course, we’ll choose the first option.
You now have successfully incorporated your WellSaid narration into your course slide!
Adding Audio to an Image or Object
For part of our course, we want to ask students to listen to several audio samples on one slide. To do this, we will need to add our WellSaid clips to “play” buttons on a slide.
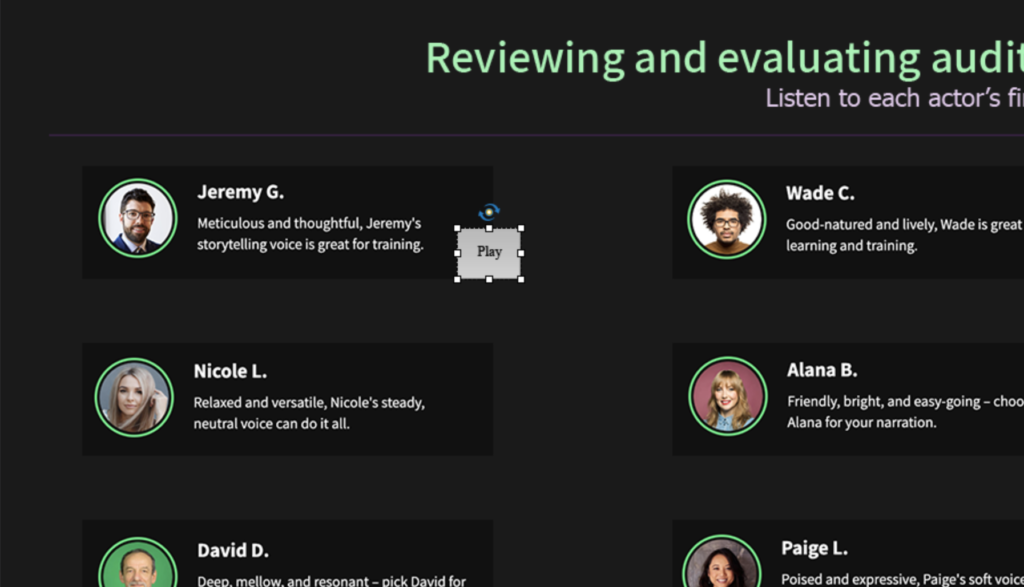
First, create your slide layout. For our course, we’ve included six AI voice actors on this slide.
Select the object or image you’d like to narrate. In our course, Jeremy’s “Play” button is selected.
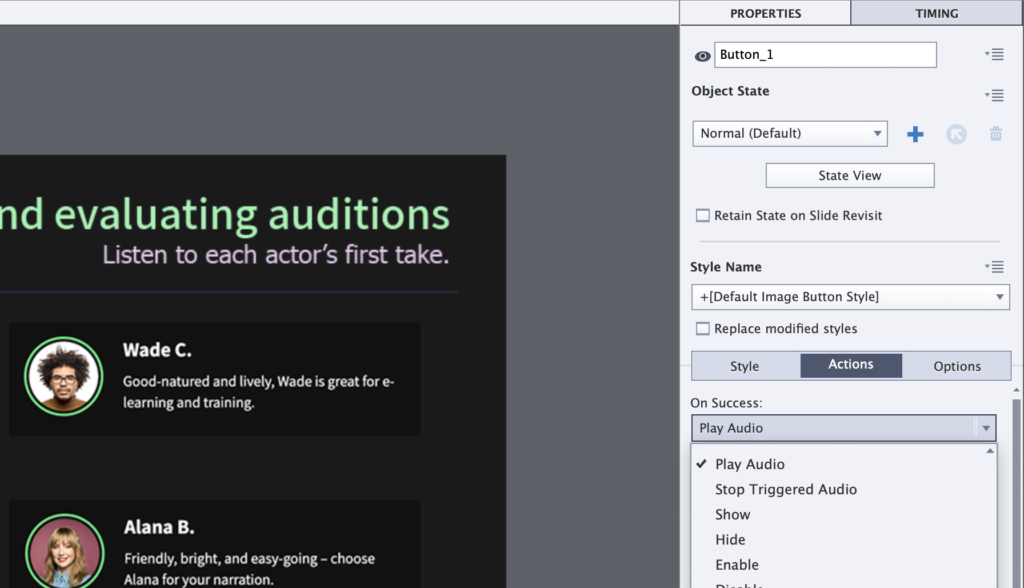
Click “Properties” from the right-hand menu.
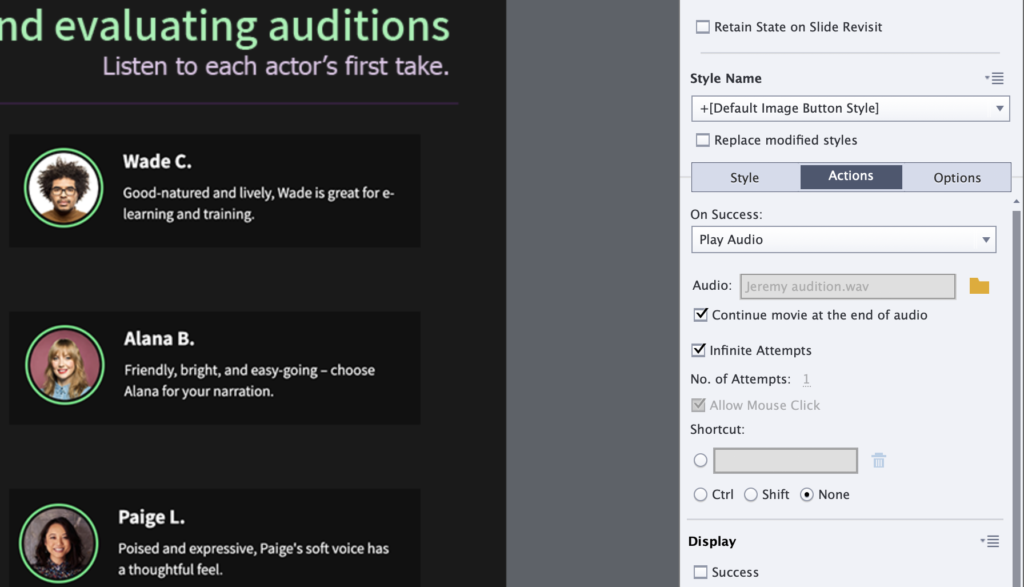
In the middle of the menu, you’ll see three choices: Style, Actions, and Options.
Select “Actions.”
Under“On Success:” select “Play Audio” from the dropdown menu.
Click on the yellow folder icon to select your audio file.
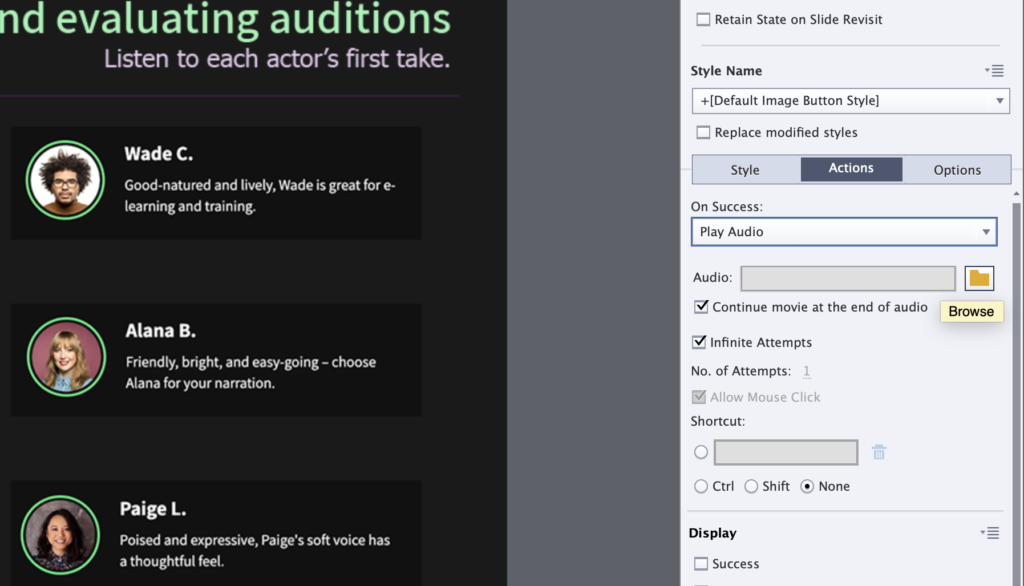
If you want your students to be able to listen to the audio file repeatedly, click “Infinite Attempts.”
That’s it! You’ve just successfully attached your WellSaid audio to an object in your Captivate course!


